Mixing vocals might seem like a tough nut to crack, but it’s really just about following the right steps. Whether you're a beginner or someone who's been at it for a while, getting vocals to sound clean and professional can make or break your track. The good news? You don’t need a fancy studio or expensive gear to make it happen. In this guide, we’ll break down seven simple techniques to help you mix vocals like a pro in 2025. Let’s dive in.
Key Takeaways
- Start with clean and organized tracks to ensure a smooth mixing process.
- Always pick the best vocal takes to work with for a polished final sound.
- Remove background noise to keep the vocals clean and focused.
- Use tools like Nectar’s Vocal Assistant to speed up your workflow.
- Don’t forget level automation and compression to balance dynamics effectively.
1. Clean Up Your Tracks
Alright, first things first—let’s tidy up those vocal tracks. Think of this step as decluttering your musical closet. You wouldn’t wear a wrinkled shirt to a job interview, right? Same logic applies here. Messy tracks = messy mix.
Why Clean Tracks Matter
Clean tracks are easier to work with and make everything down the line—EQ, compression, effects—so much smoother. Plus, your ears will thank you later.
Steps to Clean Up Your Tracks:
- Organize Your Session: Label everything. Seriously, don’t just leave it as "Audio_01"—you’ll hate yourself later. Name your tracks, color-code them if you’re feeling fancy, and group similar elements.
- Trim The Fat: Cut out any dead air or awkward noises. That random cough or the sound of your chair creaking? Yeah, it’s gotta go.
- Tighten Timing: If your vocal timing is off, use tools like quantization or manual edits to line everything up. You want your vocals to sit nicely with the beat.
- Control Breaths and Sibilance: Those sharp "S" sounds and heavy breaths? Use a de-esser or manually lower their volume. Trust me, no one wants to hear Darth Vader in your mix.
Cleaning up your tracks is like prepping ingredients for a recipe. You can’t make a gourmet meal with spoiled veggies, and you can’t make a killer mix with sloppy tracks.
2. Choose The Best Vocal Takes
Alright, let’s talk about the first step to making your vocals sound like they belong on a Grammy-winning record: picking the right takes. This isn’t just about choosing the ones where you hit the notes right (although, yeah, that’s important). It’s about finding the moments where everything clicks—emotion, tone, energy.
Why Comping is Your Best Friend
Here’s the deal: vocal comping is where the magic starts. You’re basically Frankenstein-ing together the best parts of multiple takes to create one killer track. For example, grab the verse from Take 3, the chorus from Take 7, and that one perfect high note from Take 5. Boom—instant masterpiece.
Steps to Nail It:
- Listen Critically: Don’t just go with the first take that sounds decent. Play them all back and compare. Yes, it’s tedious, but trust me, it’s worth it.
- Label Everything: Keep your takes organized. Name them something like "Verse_GoodTiming" or "Chorus_CrispTone" instead of "AudioFile_938475" because chaos is not your friend.
- Timing is Everything: If your harmonies or doubles sound like they’re late to the party, fix it now. Use your DAW to align them so they’re tight with the main vocal.
Pro Tip: This is your chance to clean up any weird breaths, awkward pauses, or random background noises. Nobody needs to hear your cat meowing in the middle of a heartfelt ballad.
Bonus: Save Time Later
Comping your vocals upfront means you’re not wasting time EQ-ing or compressing takes you won’t even use. It’s like cleaning your kitchen before you cook—you’ll thank yourself later. Speaking of clarity, if you’re diving into EQ next, check out Mastering FL Studio's Parametric EQ 2 for some solid tips.
So, grab your headphones, get cozy with your DAW, and start slicing and dicing those takes. Your future self (and your listeners) will thank you.
3. Remove Unwanted Noise
Let’s face it—no matter how fancy your recording setup is, unwanted noise has a way of sneaking in like that one friend who always shows up uninvited. It could be the hum of your AC, a dog barking in the distance, or even your vocalist’s overly enthusiastic breathing. Noise happens. But don’t worry, we’ve got ways to kick it out.
Step-by-Step Noise Removal
- Find the Culprits:
- Start by isolating your vocal tracks.
- Listen carefully for background nuisances like hisses, hums, or clicks.
- Use Noise Reduction Tools:
- Tools like iZotope RX can work wonders for reducing noise without wrecking your sound.
- Be gentle—go for subtle adjustments rather than aggressive filtering.
- Polish It Up:
- After applying noise reduction, double-check that your vocals still sound natural and alive. You want clarity, not robotic vibes.
Pro Tip: Sometimes, less is more. Over-processing your vocals can make them sound less human—unless that’s what you’re going for, in which case, carry on, robot overlord.
When All Else Fails
If manual tweaking feels like too much work (we get it, life’s short), tools like Nectar’s "Tame Noises" feature can save the day. Just turn it on, and let it handle those pesky non-sung sounds for you. It’s like having a personal noise bouncer for your tracks.
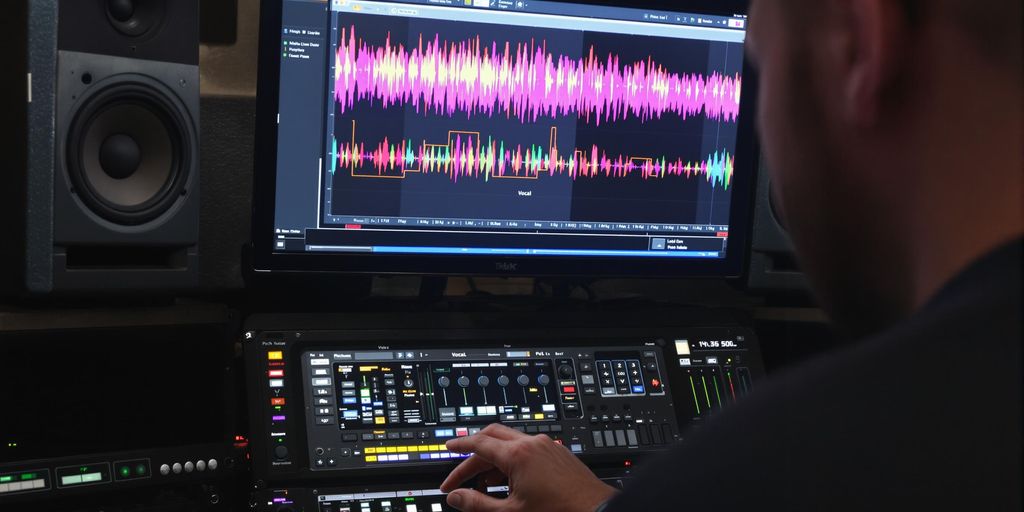
4. Use The Vocal Assistant In Nectar
Mixing vocals can feel like trying to solve a Rubik's Cube in the dark. But guess what? Nectar 4’s Vocal Assistant is here to save the day—and your sanity. This nifty tool listens to your vocal track and does the heavy lifting for you. Think of it as your personal vocal mix butler, minus the bow tie.
Here’s how you can put it to work:
- Load Nectar 4 onto your vocal track. Easy, right? It’s like step one of making toast: plug in the toaster.
- Switch to the Vocal Assistant View. This is where the magic happens. Press play and let it analyze your track.
- Sit back while it creates a custom preset. Seriously, it’s like having a chef whip up a meal tailored just for you—except this meal is pure vocal gold.
What Does It Actually Do?
The Vocal Assistant doesn’t just stop at "analyzing stuff." It adjusts pitch, EQ, compression, and even reverb to make your vocals shine. Oh, and if you’re aiming for a specific vocal sound, pair it with Audiolens. This combo lets you match your track to a reference vocal with just a few clicks. Pretty sweet, huh?
Pro Tip: If you’re feeling lazy (no judgment), let the Vocal Assistant handle the grunt work first. Then, you can tweak things to your heart’s content without starting from scratch.
With Nectar 4 Elements, achieving polished vocals has never been easier. It’s like having a cheat code for studio-quality sound—except it’s totally legit. So, why stress when you can let the AI do its thing?
5. Apply Pitch Correction
Alright, let’s talk pitch correction. It’s like giving your vocals a little nudge in the right direction when they wander off-key. Even the best singers sometimes hit a sour note—it happens! But with the right tools and techniques, you can make those vocals shine like a freshly polished car.
Manual vs. Automatic Correction
There are two main ways to fix pitch issues: manually or automatically. Each has its perks and quirks:
- Manual Correction: Think of this as the "handcrafted" approach. You zoom in on individual notes and tweak them one by one. It’s time-consuming, sure, but it gives you full control over the vocal’s feel and emotion. Perfect for those "diva moments" in your track.
- Automatic Correction: This is your quick-fix solution. Plugins like Auto-Tune or Melodyne can do the heavy lifting for you. Just set the key and let the software work its magic. It’s fast, but you might lose some of the human touch if you’re not careful.
Steps for Manual Pitch Correction
- Find the Off-Notes: Solo the vocal track and listen carefully for anything that sounds off. Isolate those rogue notes.
- Adjust the Pitch: Use your DAW’s pitch correction tool to nudge the note back in key. Don’t overdo it—subtlety is key!
- Check the Flow: Play the section back with the rest of the mix. Does it sound natural? If not, tweak it again.
Choosing the Right Pitch Correction Plugin
Not all plugins are created equal. Here’s a quick comparison of some popular options:
| Plugin | Best For | Price Range |
|---|---|---|
| Auto-Tune | Quick fixes | $$$ |
| Melodyne | Detailed adjustments | $$$$ |
| Graillon (Free) | Budget-friendly tweaks | Free |
Why Pitch Correction Matters
A perfectly tuned vocal can be the difference between "meh" and "wow." It’s not about making someone sound robotic—it’s about making them sound their best.
And hey, if you’re working in FL Studio, you can combine pitch correction with other tricks like EQ and compression to really nail that studio-quality sound. Mastering sound in FL Studio is all about layering these techniques for a killer mix.
6. Use EQ To Create Clarity

If your vocals sound like they’re trapped underwater or buried under a pile of blankets, it’s time to bring in the EQ. Equalizing your vocals is like giving them a good polish—they’ll shine and sit perfectly in your mix. Think of it as sculpting sound.
Steps to EQ Vocals Like a Pro
- Start with a High-Pass Filter: This is your first move. Roll off everything below 100 Hz to get rid of unnecessary low-end rumble. Unless your vocalist is secretly a bass guitar, you don’t need those sub frequencies.
- Tame the Low Mids (200-300 Hz): This range is where muddiness loves to hang out. A slight cut here can make your vocals sound clearer and less like they’ve been recorded in a sock drawer.
- Boost the Presence Range (2-5 kHz): Want your vocals to pop? A gentle boost in this range can make them sound more present and alive. But don’t go too far—no one wants ear fatigue.
- Add Air (10-12 kHz): Sprinkle in a touch of high-end sparkle to give your vocals that professional, airy feel. It’s like adding a pinch of salt to a dish—it just makes everything better.
Quick Tip
Subtractive EQ is your best friend. Cutting frequencies instead of boosting them often leads to a more natural sound. Overdoing it can make your vocals feel robotic, and unless you’re mixing for a sci-fi movie, that’s probably not the vibe.
Example EQ Settings
| Frequency Range | Action | Why It Helps |
|---|---|---|
| Below 100 Hz | High-pass filter | Removes rumble and low-end noise |
| 200-300 Hz | Slight cut | Reduces muddiness |
| 2-5 kHz | Gentle boost | Adds presence and clarity |
| 10-12 kHz | Light boost | Adds air and sparkle |
For a studio-quality vocal mix, don’t forget to use tools like Silk to enhance the sound before diving into EQ. It’s all about balance—make your vocals clear, warm, and ready to steal the spotlight.
7. Use Level Automation And Compression
Automation: Tame the Wild Beasts of Volume
Let’s face it, vocals can be all over the place. One second, they’re whispering sweet nothings, the next, they’re belting like it’s karaoke night. This is where automation comes in. Instead of letting those volume spikes and dips wreak havoc on your mix, you can manually adjust the levels to keep things balanced. Think of it as telling your vocals to chill out—or step up—exactly when they need to.
Here’s how to do it:
- Insert a gain plugin at the start of your vocal chain. This lets you tweak the levels before any other effects come into play.
- Play through the track and listen for the loud and quiet spots. Adjust the gain plugin to even things out.
- If you’ve got a control surface, ride the fader like you’re an old-school engineer—it’s oddly satisfying.
Compression: The Final Polish
Once your automation is set, it’s time for compression. Compression is like the cherry on top of your vocal mix—it smooths out any remaining rough edges and makes everything sound polished. The goal here is to tame those pesky peaks and bring up the quieter parts without squashing the life out of your performance.
Here’s a quick cheat sheet for compression settings:
| Setting | Suggested Value | What It Does |
|---|---|---|
| Threshold | -20 dB | Determines when compression kicks in |
| Ratio | 3:1 | Controls how much compression is applied |
| Attack | 10 ms | How quickly compression starts |
| Release | 50 ms | How quickly it stops |
For an extra touch of magic, try compression applied after automation. It ensures your vocals stay consistent and dynamic, giving you that pro-level sound.
When your vocals are both automated and compressed, they’ll sit in the mix like they were born to be there. It’s like turning chaos into harmony—except with less drama.
To make your music sound better, try using level automation and compression. Level automation helps you control the volume of different parts of your track, making sure everything is balanced. Compression is a tool that keeps the loud sounds from being too loud and the soft sounds from being too soft. This way, your music will sound more professional. Want to learn more about creating great beats? Visit our website for tips and high-quality beats!
Wrapping It Up: Your Vocals Are Ready to Shine
Alright, so there you have it—your crash course in vocal mixing! By now, you should be armed with enough tips and tricks to turn those raw vocal tracks into something that sounds like it belongs on the Billboard charts. Remember, mixing is as much about experimenting as it is about following rules. So, don’t be afraid to twist a few knobs, try out that weird plugin, or crank the reverb just to see what happens. Worst case? You hit undo. Best case? You create something magical. Now go forth, mix those vocals, and make your tracks sound so good that even your mom will stop asking, "Is this supposed to sound like that?"
Frequently Asked Questions
What is the first step to mixing vocals?
The first step is to clean up your tracks. This involves making sure the recordings are free from any unnecessary sounds or issues before you start mixing.
Why is choosing the best vocal take important?
Picking the best vocal take ensures you’re working with the highest quality performance, which makes the mixing process smoother and the final result better.
How do I remove unwanted noise from vocal tracks?
You can use tools like noise gates or specialized noise reduction plugins to eliminate background sounds and make the vocals sound cleaner.
What does the Vocal Assistant in Nectar do?
The Vocal Assistant in Nectar can automatically analyze your vocal track and suggest settings like EQ, compression, and effects to improve the sound.
Why should I use pitch correction?
Pitch correction helps to fix any off-key notes, making the vocals sound more polished and professional.
What is the purpose of level automation and compression?
Level automation and compression help to balance the volume of the vocal track, ensuring that it stays consistent and clear throughout the song.