
Sampling in FL Studio is like opening a treasure chest of creativity. Whether you're just starting out or you've been making beats for years, there's always something new to learn. This guide will walk you through everything you need to know about sampling in FL Studio, from chopping up sounds to layering and automating them. Let's get into it and start crafting some amazing tracks.
Key Takeaways
- Chopping samples is a must-know skill for adding flair to your music.
- The Fruity Slicer is a powerful tool that simplifies sampling.
- Time-stretching and pitch-shifting can drastically change your samples.
- Layering sounds creates a richer and fuller track.
- Automation brings movement and life to your samples.
Mastering the Art of Chopping Samples Like a Pro
Why Chopping Samples Is the Secret Sauce
Alright, let’s get real—chopping samples is like the seasoning in your grandma’s famous spaghetti sauce. It’s what makes your beats stand out. By slicing up a sample, you’re not just using it—you’re remixing it, reshaping it, and making it yours. Think of it as turning a boring jigsaw puzzle into a chaotic masterpiece. The best part? There’s no wrong way to chop—only cooler ways to experiment.
Tools in FL Studio That Make Chopping a Breeze
FL Studio gives you a bunch of tools to slice and dice, but the MVP? The SliceX and Fruity Slicer. Here’s a quick breakdown:
| Tool | Why It’s Awesome |
|---|---|
| SliceX | Advanced slicing with extra sauce! |
| Fruity Slicer | Simple, fast, and gets the job done |
Steps to get started:
- Load your sample into SliceX or Fruity Slicer.
- Adjust the grid to match your sample’s tempo.
- Start chopping and rearranging like a mad scientist.
Common Mistakes to Avoid When Chopping
Nobody’s perfect, but let’s dodge these rookie errors:
- Over-chopping: Yes, you can overdo it. If your track sounds like a blender, take a step back.
- Ignoring tempo: Always match the sample’s BPM to your project. Otherwise, it’s chaos.
- Forgetting to save: Trust me, FL Studio crashes at the worst times.
Pro Tip: Sometimes the best chops come from happy accidents—so don’t delete something just because it sounds weird at first. Weird can be good!
Unleashing the Power of the Fruity Slicer
What Makes the Fruity Slicer a Game-Changer
Let’s be real—FL Studio’s Fruity Slicer is like the Swiss Army knife of sampling tools. It takes your audio and dices it up into bite-sized pieces, ready for you to rearrange like a musical jigsaw puzzle. Why is it so special? Because it saves you hours of manual chopping while giving you the flexibility to go wild with your creativity. Need to turn a boring drum loop into a funky breakbeat? Fruity Slicer’s got your back. Want to remix a vocal sample into something unrecognizable? Easy peasy.
Step-by-Step Guide to Using the Fruity Slicer
Here’s how to get started with the Fruity Slicer without pulling your hair out:
- Load Your Sample: Drag and drop your audio file into the Fruity Slicer channel. It’s as simple as ordering takeout.
- Choose Your Slicing Mode: Head to the settings and pick how you want your sample chopped—beats, bars, or even manual slicing if you’re feeling fancy.
- Tweak Each Slice: Adjust the pitch, volume, or even reverse individual slices. Think of it as seasoning each piece of your sonic meal.
- Play It Out: Use your MIDI keyboard or even your computer keys to trigger the slices. Instant creativity at your fingertips.
Pro Tip: Experiment with the attack and decay settings to smooth out transitions between slices. Nobody likes a choppy track (pun intended).
Creative Hacks to Maximize the Fruity Slicer
Once you’ve got the basics down, it’s time to go next level. Here are some hacks to make your tracks stand out:
- Layer Your Slices: Duplicate the Fruity Slicer channel and pitch-shift one layer. This creates a rich, textured sound that’s chef’s kiss.
- Use Effects: Add reverb, delay, or distortion to individual slices to make them pop. A dry snare can transform into a spacey hit with just a touch of reverb.
- Randomize Slice Order: Feeling adventurous? Randomize the order of your slices for a glitchy, experimental vibe. It’s like shuffling a deck of cards but for music.
Sometimes the best ideas come from happy accidents. Don’t overthink it—just slice, dice, and see what sticks.
By the way, if you're new to music production, you might want to check out this beginner's guide to music production. It's packed with tips to help you get started and stay inspired.
The Magic of Time-Stretching and Pitch-Shifting
How Time-Stretching Can Transform Your Samples
Time-stretching is like the Swiss Army knife of sampling. It lets you change the tempo of a sample without messing with its pitch. Imagine you’ve got this killer guitar riff, but it’s just a tad too fast for your beat. No problem! With time-stretching, you can slow it down to match your tempo while keeping that sweet, sweet tone intact. FL Studio makes this super easy—just drag your sample into the Playlist, grab the edges, and stretch it to your heart’s content.
Here’s why it’s a game-changer:
- Seamless tempo matching: Perfect for when you’re working with samples from different sources.
- Creative freedom: Stretch a vocal snippet into a haunting, elongated melody.
- Avoids pitch distortion: Unlike just slowing down the track, time-stretching keeps the sample’s original vibe.
Pro Tip: Use the "Stretch" mode in FL Studio’s Sampler Channel for precise control over your adjustments. Your beats will thank you.
Pitch-Shifting: The Key to Unique Sounds
Pitch-shifting is where things get spicy. This technique lets you change the pitch of a sample while keeping the tempo steady. Want to turn a deep bassline into a sharp, edgy lead? Or maybe you’re feeling experimental and want to make a vocal sample sound like it’s from another dimension. Pitch-shifting can do all that and more.
Here’s how to nail it in FL Studio:
- Load your sample into the Sampler Channel.
- Adjust the pitch knob to go up or down in semitones.
- Fine-tune with the "Time" knob if needed.
Quick tip: Layer pitch-shifted samples to create harmonies or add depth to your track. It’s like turning one sound into a mini orchestra.
Combining Both for Mind-Blowing Effects
Now, here’s where the real fun begins—mixing time-stretching and pitch-shifting. This combo lets you completely transform a sample into something unrecognizable (in a good way). For instance, slow down a drum loop with time-stretching, then pitch it up for a glitchy, futuristic vibe. Or take a vocal sample, pitch it down for a moody feel, and stretch it out to make it atmospheric.
Some ideas to get you started:
- Create dreamy pads by stretching and pitching vocal samples.
- Turn a basic piano loop into a lo-fi masterpiece.
- Experiment with reversing the sample before applying these effects for an otherworldly sound.
| Effect | Time-Stretching | Pitch-Shifting | Combo |
|---|---|---|---|
| Tempo adjustment | ✅ | ❌ | ✅ |
| Pitch manipulation | ❌ | ✅ | ✅ |
| Creative sound design | ✅ | ✅ | ✅ |
Sometimes, the best sounds come from happy accidents. Don’t be afraid to tweak knobs and stretch boundaries—literally!
Layering Samples for That Full, Rich Sound
Why Layering Is Like Building a Sonic Sandwich
Layering samples is basically the audio version of stacking a killer sandwich. You’ve got your bread (the foundation), your meats and cheeses (the main flavors), and those little extras like pickles or mustard (the spark of creativity). Each sound you add should bring something unique to the table, but together they need to blend into one tasty bite. The goal? A track that feels full, balanced, and satisfying.
Here’s how to get started:
- Pick complementary samples. A deep bass paired with a snappy snare can work wonders.
- Avoid overcrowding. Too many layers and your sandwich—err, track—turns into a mess.
- Use effects sparingly. A touch of reverb or delay can make things pop, but don’t drown your samples in sauce.
How to Balance Layers Without Overcrowding
Balancing layers is like hosting a dinner party. Everyone (or every sound) needs their own seat at the table. If two guests are fighting for the same chair (read: frequency range), it’s chaos. To avoid this:
- EQ your layers. Cut out unnecessary frequencies so each sound has its own space. For example, roll off the low end on your hi-hats to keep them crisp.
- Pan wisely. Spread your sounds across the stereo field. That bass drum? Dead center. Those airy pads? Maybe off to the side.
- Volume control. Not every sound needs to scream for attention. Let your lead elements shine while supporting layers play a quieter role.
Layering is all about teamwork. Each sound should play its part without stepping on anyone else’s toes. When done right, the result is pure harmony.
Using EQ to Carve Out Space for Each Layer
Think of EQ as your sonic sculpting tool. You’re carving out spaces where each layer can live happily without bumping into its neighbors. Here’s a quick cheat sheet:
| Sound Type | Frequency Focus | EQ Tips |
|---|---|---|
| Kick Drum | 50-100 Hz | Boost lows, cut mids |
| Snare | 200 Hz, 2-5 kHz | Boost attack, cut mud |
| Vocals | 1-3 kHz | Boost clarity, cut harshness |
| Pads/Ambience | 500 Hz-10 kHz | Boost air, cut clutter |
When layering, always ask yourself: Does this sound need to be here? If it’s not adding flavor, it’s just filler. And nobody likes a boring sandwich—or track.
For a fresh source of inspiration, try the "Wonderland" Melody Loops Pack by Slime Green Beats. It’s packed with expertly crafted loops that can help you build layers that truly complement each other.
Automation: Breathing Life Into Your Samples
What Is Automation and Why It’s Essential
Automation is like the secret ingredient in your favorite recipe—it adds that extra oomph to your tracks. Without it, your music can sound static, like it’s just going through the motions. With automation, though, you can make sounds evolve, fade, swell, and dance all over the place. It’s basically your way of saying, “Hey, I’m in charge here!” Whether you’re tweaking volume, panning, or effects, automation lets you take control and craft a dynamic, engaging track.
How to Automate Parameters in FL Studio
Alright, let’s get practical. Automating in FL Studio is easier than trying to assemble IKEA furniture. Here’s how you do it:
- Right-click on the parameter you want to automate. This could be anything—volume, reverb, filter cutoff, you name it.
- Select “Create Automation Clip” from the dropdown menu. Boom! An automation clip appears in your Playlist.
- Adjust the curve by dragging those little points around. Want a smooth fade-in? Create a gentle slope. Need a sudden drop-off? Make it steep.
- Play your track and watch the magic happen as your automation breathes life into your samples.
Pro Tip: If you’re working with a lot of automation clips, rename them! Trust me, “Automation Clip 32” won’t mean much when you’re knee-deep in your project.
Creative Automation Tricks for Dynamic Tracks
Now that you’ve got the basics, let’s spice things up. Here are some creative ways to use automation:
- Reverb Swells: Automate the reverb wet/dry mix to make your track feel like it’s expanding and contracting. Perfect for transitions.
- Filter Sweeps: Gradually open up a low-pass filter to create that classic “rising tension” effect.
- Pitch Automation: Add a subtle pitch rise or fall to give your sample a warped, otherworldly vibe.
Automation is your playground. Don’t be afraid to experiment. Sometimes the weirdest ideas turn out to be the most exciting parts of your track.
And hey, if you’re looking for some beats to experiment with, check out royalty-free hip hop beats by Slime Green Beats. They’re perfect for trying out all these automation tricks!
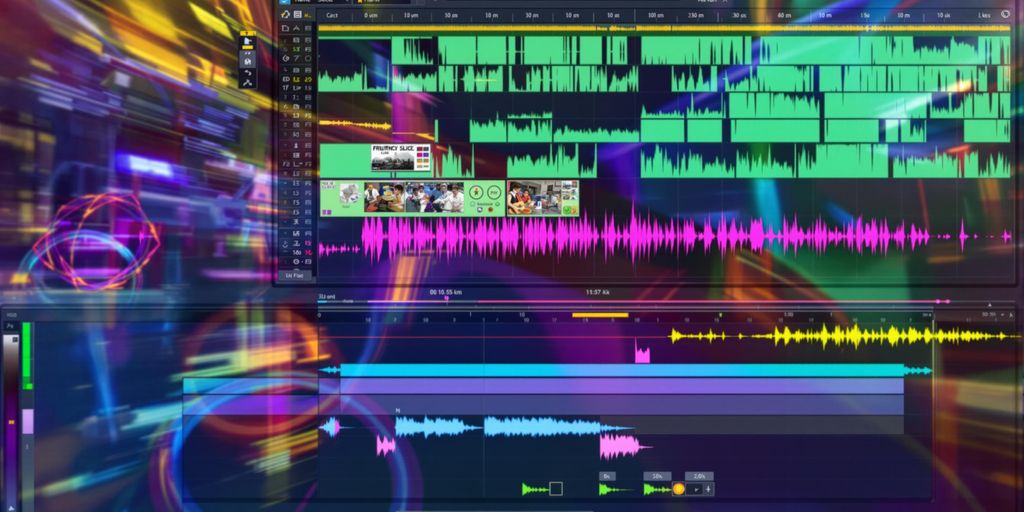
Navigating the FL Studio Interface Without Losing Your Mind
Breaking Down the Channel Rack, Playlist, and Mixer
Alright, let’s face it—opening FL Studio for the first time can feel like stepping into the cockpit of a spaceship. But don’t worry, you won’t need a pilot’s license. The interface is divided into three main areas:
- Channel Rack: Think of this as your beat-building playground. Each row represents a sound, like a kick drum or snare. You can click on the step sequencer to create patterns. Want to add more sounds? Just drag them in from the Browser. Easy.
- Playlist: This is your canvas, where you arrange all those patterns into a full track. It’s like a giant puzzle, except you decide what the picture looks like.
- Mixer: Here’s where you tweak and polish your sounds. Adjust volumes, add effects, and make everything sound just right. Pro tip: Don’t go overboard with effects—it’s tempting, but less is often more.
Tips for Organizing Your Workflow Like a Pro
A messy project can kill your vibe faster than a computer crash. Here’s how to keep things clean and efficient:
- Color-code your tracks: Assign colors to different types of sounds (drums, vocals, synths). It makes navigation a breeze.
- Name everything: “Audio Clip 003” means nothing when you’re knee-deep in a project. Rename your clips and channels so you know what’s what.
- Use templates: Save a basic project setup with your favorite plugins and settings. It’ll save you loads of time.
Hidden Features That Will Save You Hours
FL Studio is packed with little gems that can make your life so much easier. Here are a few to check out:
- Ctrl + Shift + Left-Click: Solo a track instantly in the Playlist or Mixer. Great for quick edits.
- F6, F5, F9: Open and close the Channel Rack, Playlist, and Mixer, respectively. Keyboard shortcuts are your best friend.
- Browser Search Bar: Looking for a specific sample or plugin? Type it in, and FL Studio will find it for you. No more endless scrolling.
"Learning FL Studio is like learning to ride a bike. At first, it’s wobbly and awkward, but once you get the hang of it, you’ll be cruising through tracks like a pro."
Sampling Vocals: Adding Depth and Emotion to Your Tracks
How to Find the Perfect Vocal Sample
Alright, let’s face it—finding the perfect vocal sample is like trying to find your favorite sock in a pile of laundry. But hey, don’t sweat it. Start with FL Studio’s Library. Navigate to Packs > Vocals, and you'll find a goldmine of vocal snippets. Whether you want a soulful "Ooh," a haunting "Ahh," or even a quirky phrase, this section has you covered.
If you’re not feeling the built-in options, consider importing external samples. Just drag and drop your audio file into the Browser. Bonus tip: FL Studio's Sampler Channel is your best buddy for tweaking these samples to fit your vibe.
Techniques for Blending Vocals Seamlessly
Nobody wants their track to sound like a bad karaoke night. The key to blending vocals seamlessly is all about balance. Here’s a quick checklist to keep things smooth:
- EQ Like a Pro: Use an EQ to carve out space for the vocals. Cut frequencies that clash with your instruments.
- Layer It Right: Don’t stack too many effects. A touch of reverb and delay can work wonders without overcrowding.
- Volume Automation: Automate the volume to make the vocals sit naturally in the mix. Think of it as giving them a comfy chair to chill in.
Using Effects to Enhance Vocal Samples
Effects are like seasoning for your vocals—just the right amount can make them pop. Here are some fun ideas:
- Reverb: Add some space and depth. Perfect for creating that dreamy or haunting vibe.
- Pitch Shifting: Want chipmunk vocals or something dark and moody? Shift the pitch up or down for instant drama.
- Reverse It: Flip the sample backward for an unexpected twist. It’s weird, but it works.
Pro Tip: When in doubt, experiment. Some of the coolest vocal effects happen by accident. Just don’t forget to save your project—nobody likes losing a masterpiece.
Troubleshooting Sampling Issues Like a Detective
Common Problems When Sampling in FL Studio
Let’s face it: sampling isn’t always smooth sailing. Sometimes, it feels like FL Studio is out to get you. Here are some common headaches:
- Audio glitches: Pops, clicks, or just weird noises that make you question your life choices.
- Timing issues: Your sample refuses to sync with the beat no matter how much you tweak.
- Mysterious crashes: FL Studio decides to quit on you mid-session. Fun times.
Quick Fixes for Sampler Channel Glitches
When the Sampler Channel starts acting up, don’t panic. Try these quick fixes:
- Adjust the buffer size: A too-small buffer can cause glitches. Increase it in the audio settings to give your CPU some breathing room. More tips on buffer sizes.
- Reset the plugin: Sometimes, a simple reset is all you need to get things back on track.
- Check your sample file: Corrupted audio files can wreak havoc. Re-import or replace the file if needed.
When to Call It a Day and Start Fresh
Sometimes, you’ve done all the troubleshooting you can, and it still feels like you’re wrestling a bear. Here’s when to throw in the towel:
- You’ve spent hours tweaking and nothing’s improved.
- The issue is so obscure that even Google doesn’t have answers.
- You’re starting to hate the track. Seriously, step away before you ruin it.
Pro tip: Take a break, grab a snack, and come back later. Fresh ears can solve problems even Google can’t.
When it comes to fixing problems with sampling, think of yourself as a detective. Start by looking closely at the details. Check your equipment and settings to make sure everything is working right. If something seems off, don’t hesitate to dig deeper. Remember, every clue can lead you to the solution. For more tips and tricks on music production, visit our website and explore our resources!
Conclusion
Alright, so there you have it—sampling in FL Studio, demystified and ready for you to conquer. Whether you're chopping up old vinyl records or turning your cat's meow into a bassline (hey, no judgment), the tools are all there. Just remember, it's not about being perfect; it's about having fun and making something that feels uniquely yours. So go ahead, hit those pads, twist those knobs, and let your creativity run wild. Who knows? Your next masterpiece might just be one weird sample away. Now, stop reading and start sampling!
Frequently Asked Questions
Can I use FL Studio for sampling if I'm a beginner?
Yes, FL Studio is beginner-friendly and offers plenty of tools and tutorials to help you get started with sampling. Just take your time and explore its features.
What’s the easiest way to chop samples in FL Studio?
The Fruity Slicer is a great tool for chopping samples. You can load your sample, and it will automatically slice it into sections for you to use.
How can I make my samples sound unique?
You can use techniques like pitch-shifting, time-stretching, and layering. Adding effects like reverb or distortion can also help create a unique sound.
Why is layering samples important?
Layering helps create a fuller and richer sound by combining different elements. It allows each sample to shine while contributing to the overall mix.
What should I do if my samples don’t sync with the project’s tempo?
Use the time-stretching feature in FL Studio to adjust the sample's tempo to match your project’s BPM. This ensures everything stays in sync.
Is automation necessary when working with samples?
Automation isn’t mandatory, but it’s highly recommended. It adds movement and dynamics to your tracks, making them more engaging.


