
So, you've got FL Studio open and you're staring at the Playlist, wondering how to make the most out of it. It's the place where all your patterns and audio clips come together to form a complete track. But let's face it, it can be a bit overwhelming at first. This guide will break it down for you, step by step, so you can start creating music like a pro.
Key Takeaways
- Get familiar with the Playlist interface to streamline your music production process.
- Organize your tracks with color-coding and grouping for better efficiency.
- Use creative arrangement techniques to make your music stand out.
- Master automation clips to add dynamics and interest to your compositions.
- Enhance your workflow with Playlist tools like the Paintbrush and Snap features.
Mastering the Basics of FL Studio's Playlist
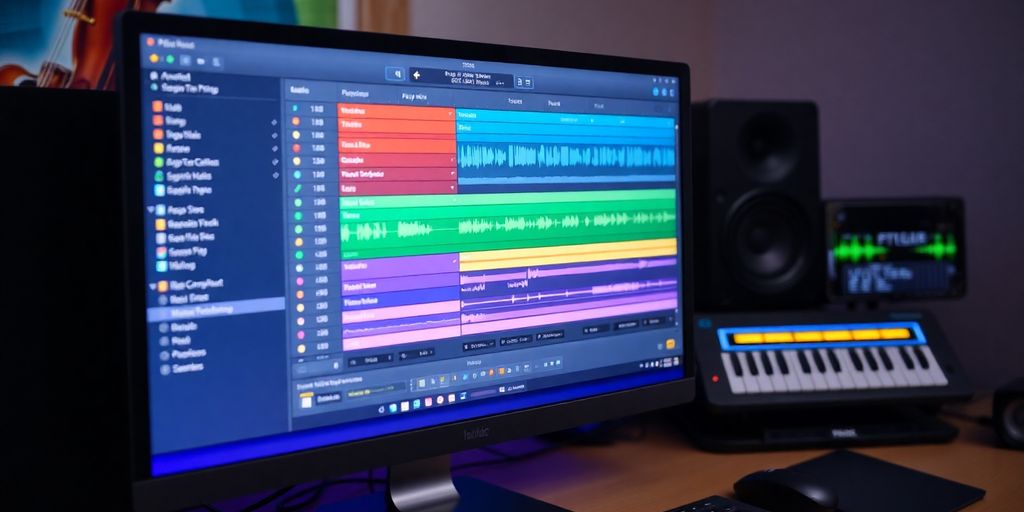
Understanding the Playlist Interface
Alright, let's kick things off with the Playlist interface. Imagine this as your musical canvas. This is where the magic happens—where you arrange your patterns and audio clips into a complete track. The Playlist is super flexible. You can drag and drop patterns from the Channel Rack or Browser, and place them anywhere you like. Each track is independent, so you can layer sounds without any fuss. Plus, resizing tracks is a breeze—just drag the edges. You'll be amazed at how quickly you can start shaping your song.
Navigating the Playlist Toolbar
Now, onto the Playlist toolbar. This is your toolkit for creating music magic. You've got the Paintbrush tool for drawing patterns, the Pencil tool for placing them precisely, and the Slice tool for cutting things up. It's all about giving you control. The toolbar is customizable too, so you can set it up just the way you like. And don't forget about the Picker Panel on the left, where you can grab your patterns and clips. It's like having a musical library at your fingertips. Optimize the Playlist for better project management by customizing these tools to suit your workflow.
Utilizing the Picker Panel
The Picker Panel is your best friend when it comes to organizing your sounds. It's where you can quickly select patterns, audio clips, or automation clips and drag them into the Playlist. Want to try something new? Just grab a clip and move it around. You're in charge. This is where you can experiment with different arrangements and see what works best. Plus, it's a great way to keep everything neat and tidy. Once you've mastered this, your workflow will be smoother than ever.
Organizing Your Tracks for Maximum Efficiency
Color-Coding and Renaming Tracks
Alright, let’s talk about keeping your tracks neat and tidy. FL Studio lets you color-code and rename your tracks, which is super handy. Imagine having a messy room where you can't find anything—color-coding is like putting things in labeled boxes. By assigning colors to related tracks, you can quickly spot what's what. Plus, renaming them to something meaningful helps when you're knee-deep in a project. To do this, just right-click on the track header and choose your color and name. Easy peasy!
Grouping Patterns and Audio Clips
Next up, grouping. This is where you take patterns and audio clips that belong together and group them up. It’s like making a playlist of your favorite songs but for your music project. Grouping helps keep everything organized and makes the whole arranging process smoother. You can drag and drop elements into groups, making it easier to move sections around without losing track of what's where. It’s a game-changer when you’re dealing with a lot of elements.
Using Time Markers for Structure
And let’s not forget about time markers. These little guys are lifesavers when it comes to structuring your song. You can use them to mark different sections like intro, verse, chorus, etc. It’s like having a roadmap for your song. To add a time marker, just hit CTRL + T and type in what you want to call it. This way, you can easily jump between sections and keep everything in check. It’s all about making your workflow as smooth as possible.
Organizing your tracks isn’t just about keeping things tidy—it's about boosting your creativity by making the process less chaotic. When you know where everything is, you can focus more on making awesome music and less on searching for that one elusive clip.
For more info on arranging your patterns and audio clips, check out the detailed guide on how to drag and drop elements onto the timeline to build your composition.
Creative Arrangement Techniques in the Playlist
Layering Patterns and Audio Clips
Alright, so you've got your patterns and audio clips ready to go. Now, it's all about layering them in the Playlist. This is where your track starts to take shape. You can stack multiple patterns or audio clips on the same track, creating rich, textured sounds. Think of it like building a sandwich; each layer adds flavor and depth. The more you experiment, the more unique your sound becomes.
Here's a quick list to get you started:
- Start simple: Begin with a basic beat or melody and gradually add more layers.
- Mix and match: Combine different sounds to see what works best together.
- Adjust timing: Use the Slip tool to tweak the timing of your clips without changing their length.
Experimenting with Arrangement Ideas
Now, don't be afraid to play around with different arrangements. This is your creative playground! Duplicate sections, move them around, or even delete parts that don't fit. The Playlist lets you try out various ideas without any commitment. It's like rearranging furniture in your room until it feels just right.
- Try variations: Create multiple versions of a section and compare them.
- Use markers: Set time markers to outline different parts of your track.
- Slice and dice: Utilize the Slice tool to cut up patterns and audio clips for more flexibility.
Sometimes, the best ideas come from happy accidents. Don't be afraid to make mistakes; they're often the stepping stones to greatness.
Using the Slip and Slice Tools
These tools are your best friends when it comes to fine-tuning your arrangement. The Slip tool lets you move the content within a clip without altering its start and end points—perfect for adjusting rhythms. Meanwhile, the Slice tool allows you to chop up your clips, giving you more freedom to rearrange and experiment.
- Slip tool tips: Great for subtle timing adjustments and creating syncopated rhythms.
- Slicing strategy: Break down clips into smaller parts to create unique transitions.
- Combine tools: Use both tools together to craft intricate patterns and audio sequences.
With these techniques, you'll be crafting tracks that not only sound great but also stand out with your personal flair. Keep experimenting and pushing boundaries—your creativity is limitless!
Harnessing the Power of Automation Clips
Creating Dynamic Compositions
Automation clips in FL Studio are like the secret sauce that can make your track come alive. You can control just about anything—volume, panning, or even the cutoff frequency of an effect—over time. It's like having a virtual knob that you can twist and turn to add movement and emotion to your music. To create an automation clip, right-click on the parameter you want to automate and select "Create automation clip." A new clip will show up in your Playlist. Now, here's where the fun begins: you can add points to this clip and move them around to shape how the parameter changes over time.
Editing Automation Points
Once you've got your automation clip, it's time to start tweaking. Right-click on the line in your automation clip to add a new point. You can drag these points up and down to change the value or left and right to adjust the timing. If you want to get fancy, right-click on a point to change the curve type. This lets you create smooth transitions or sharp changes, depending on what your track needs. Remember, automation can snap to the grid, which helps keep everything tight and in sync.
Integrating Automation with Patterns
Automation clips don't just sit there on their own—they're meant to work hand-in-hand with your patterns and audio clips. This is where you can really start to experiment. Try automating the filter cutoff on a synth pattern or the reverb on a vocal clip. The possibilities are endless, and it's all about finding what works best for your track. By integrating automation with your patterns, you can create complex, evolving compositions that keep listeners engaged from start to finish.
Automation is all about creativity. It gives you the freedom to experiment and push the boundaries of your music. Don't be afraid to try new things and see where it takes you. Who knows? You might just stumble upon the next big sound.
Enhancing Workflow with Playlist Tools
Utilizing the Paintbrush and Pencil Tools
When you're working on your next track, the paintbrush and pencil tools in FL Studio's Playlist are your best friends. These tools let you quickly and easily place patterns and clips where you want them. The paintbrush tool is great for drawing out long stretches of patterns, while the pencil tool gives you precision, allowing you to place patterns exactly where you need them.
Resizing and Adjusting Patterns
Got a pattern that's just not fitting right? No problem. You can resize patterns by dragging their edges to adjust their length. This flexibility means you can experiment with different arrangements until everything sounds just right.
Leveraging the Snap Feature
The snap feature is like having a safety net for your arrangement. It ensures that when you move or adjust patterns, they line up perfectly with the beat. This keeps your track tight and ensures everything is in sync, which is especially handy when you're working on complex compositions.
Mastering these tools can transform your workflow from chaotic to efficient, allowing you to focus more on creativity and less on logistics.
By using these Playlist tools effectively, you can streamline your production process and make your music-making journey smoother. Whether you're a beginner or a seasoned pro, these features can help you create tracks that sound polished and professional. And if you're looking to add some unique sounds to your track, consider the "Wonderland" Melody Loops Pack by Slime Green Beats for some inspiration. With 38 meticulously crafted loops, it’s a great way to elevate your music.
Advanced Tips for Professional Sound
Incorporating Effects and Fine-Tuning
Alright, so you've got your tracks laid out, but now it's time to sprinkle some magic dust—effects! Adding effects can truly transform your sound from plain to extraordinary. Dive into FL Studio's Mixer and start experimenting with reverb, delay, and chorus. These can add depth and space to your tracks. Don’t forget to fine-tune each effect to fit the vibe of your project. A little EQ here, a dash of compression there, and you're set to create a sound that's uniquely yours.
Balancing Tracks with the Mixer
Balancing is like cooking; you need just the right amount of each ingredient. The Mixer in FL Studio is your best buddy for this. Start by setting your levels so that no track overpowers the others. Use panning to give each sound its own space. This way, you avoid a muddled mix and make sure every element shines. And hey, if you're looking for more tips on mixing and leveling, there's a great eBook that dives deep into the art of beat-making.
Exporting Your Final Project
Once everything sounds just right, it's time to wrap it up and export your masterpiece. Head over to "File" and click "Export". Choose the format that suits your needs—MP3 for quick sharing or WAV for high-quality sound. Before you hit that final button, double-check your project settings to ensure everything is perfect. Exporting might seem like a small step, but it's the final touch that gets your music ready for the world.
Remember, the key to a professional sound is not just in the tools you use but in how you use them. Keep experimenting, keep learning, and most importantly, keep creating!
If you're serious about making professional-sounding music, check out our website for expert tips and resources. Don't miss out on the chance to elevate your sound! Visit us today!
Conclusion
Alright, so there you have it. The Playlist in FL Studio isn't just a tool; it's like your creative playground. Whether you're just starting out or you've been at it for a while, getting the hang of the Playlist can really change how you make music. It's all about experimenting, trying new things, and finding what works for you. Don't be afraid to mess around with different patterns and sounds. The more you play with it, the more you'll discover what you can do. So go ahead, dive in, and let your creativity flow. Who knows what amazing tracks you'll come up with next?
Frequently Asked Questions
What is FL Studio's Playlist?
FL Studio's Playlist is a feature where you can arrange and organize your music patterns and audio clips to build your song.
How do I add patterns to the Playlist?
To add patterns to the Playlist, simply drag and drop them from the Browser or Channel Rack into the Playlist area.
Can I edit my Playlist once it's created?
Yes, you can edit your Playlist by rearranging, adding, or removing patterns and audio clips to customize your song.
What are some tips for organizing tracks in the Playlist?
Some tips include color-coding tracks, grouping similar patterns, and using time markers to keep everything organized.
How do I use automation clips in the Playlist?
Create an automation clip by right-clicking a parameter and selecting 'Create automation clip.' Then, adjust it in the Playlist.
How can I export my finished project from FL Studio?
To export, go to 'File' and select 'Export,' then choose the format you want to save your project in.


